
Enter the AI robotics world with low-cost open-source robot arm and LeRobot
I have been passionate about robotics since my PhD when I was working on predicting driver attention for autonomous driving, where our team also built a model car for testing. However, at that time, the barrier to entering the robotics world was very high. For example, there were no open-source materials on how to build a robot. There are open-source robots online, but most of them require you to have knowledge of ROS and other robotics frameworks. The only doable way for people to learn robotics was through simulation. However, popular simulation platforms like Mujoco weren't open-sourced until May 2022.
In late March this year, I found a project from Hugging Face called LeRobot and got to know the low-cost open-source robot ecosystem, including the SO-ARM100 and Alex Koch arms. The ecosystem released the 3D printing files for people to print the parts and modify the design. They also provide the list of required electronic components and the assembly guide. In this way, people can build their own robot arm at a home workstation. This solved my first problem: how to build a robot.
Then for the second problem on how to control the robot, LeRobot provides a way to replace ROS so that you can write Python code to control the robot. To control a robot is like the process of training a transformer-based model. They also have a big open-source community where you can ask questions and learn from each other.
However, as a newcomer to the robot world, the whole process of building a robot and controlling it using a policy network is still very complicated. Here we provide a step-by-step guide to help you understand the whole process to demystify the robot world.
Part 1: Work Station Setup
Here is my setup for the work station:
- I connect both the leader and follower robot arms to my MacBook Pro
- I also set up three cameras to capture the robot arms' movements
- For model training, I have an NVIDIA 3090 GPU at my home workstation. It is enough to train the ACT model
- I also applied for modal credits to train the bigger model Pi0
My settings are most similar to an AI workstation: one local GPU, one MacBook Pro. And I want to leverage my local GPU as much as possible to save costs.
Part 2: 3D Print, Assemble, Calibrate, and Teleoperate
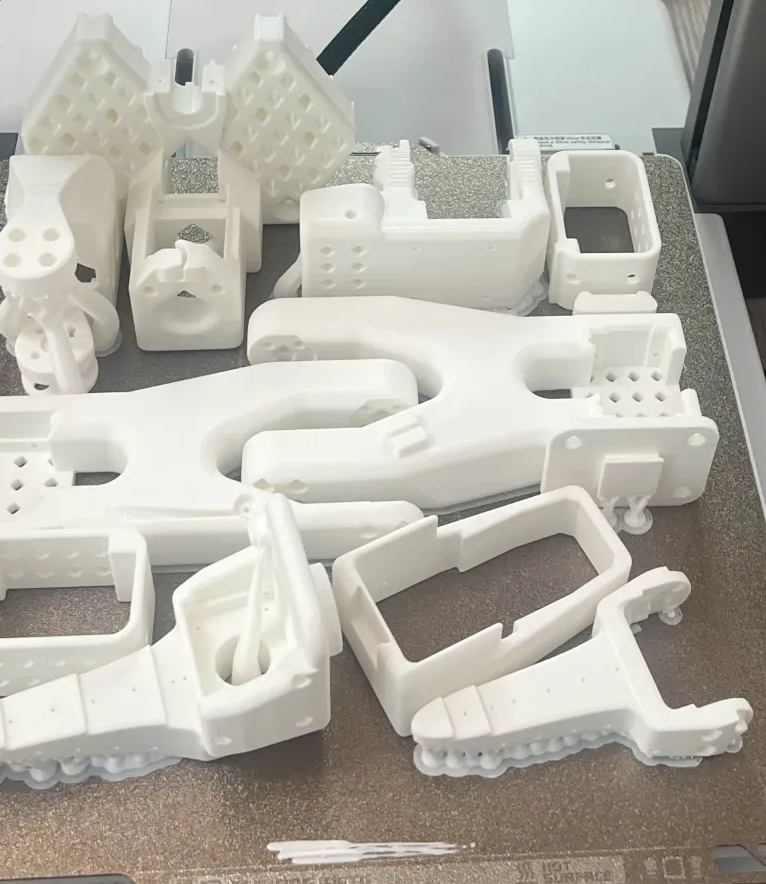
3D print the parts and assemble the robot arm. Order the electronic components and assemble the robot arm.
There are links on the official GitHub repo for people to order the assembled robot, unassembled parts, 3D printed parts, and electronic components separately. For me, I wanted to have a better understanding of the whole process, so I 3D printed the parts using my Bambu Labs A1 3D printer, and it took me about 13 hours to print all parts for one arm. For the electronic components, I ordered them from Amazon and the Feetech servos from Seeed Studio, since they can be delivered in 2-5 days. If you start from scratch, it will take you about 2-5 days to collect all the parts. The assembly process will take hours depending on your experience.
Then perform calibration and teleoperation. I followed the official guide at LeRobot to connect the robot arm to my MacBook Pro. I finished the calibration and teleoperation steps so that I can control the follower arm with the leader arm. This will take you at most 1 hour to finish teleoperation.
Part 3: Collect Data and Work with Datasets
After the teleoperation step, you can start collecting data for your tasks for model training. If it's your first time working with robot arms, you need to get used to the teleoperation process. Start with simple tasks like grasping something and dropping it in the bin.
Recording all episodes correctly during data collection is tedious and nearly impossible due to the difficulty of teleoperation. We provide a script at awesome-lerobot dataset cleaning that allows developers to select episodes from different datasets and combine them into a single LeRobot dataset.
After data collection and dataset cleaning, you can visualize your dataset using the official tool: LeRobot dataset visualizer, and then you can start training your policy network using the merged dataset.
Part 4: Train a Policy Network and Use the Trained Policy Network to Control the Robot
It is very straightforward to train an ACT model using the LeRobot framework. After you clean the dataset and upload it to the Hugging Face Hub, you can switch to your 3090 GPU to start the training process. The script will pull your dataset from the Hugging Face Hub and start training the model. After the training process, you can upload the trained model to the Hugging Face Hub. Then on your MacBook Pro, you can run the control robot script to pull the trained ACT model locally and run inference locally on your MacBook Pro to control the robot arm.
If you want to train a bigger model like Pi0 which has more than 3B parameters, 3090/4090/5090 GPUs might not be enough since you need to reduce the batch size to 1 to fit the model in the GPU memory, and the training is super slow. Instead, you can use Modal to train the model and set up a remote inference server on your 3090 GPU, and set up the client side on your MacBook Pro, so the robot arm can be controlled by the model inference server. We will provide a new blog post to show you how to do this. Stay tuned!
On June 3, 2025, the LeRobot team released a SmolVLA model, which has around 0.4B parameters, and it is a better VLA for people to get started with. You can train the model on your 3090 although it is quite slow, but you can keep the batch size the same, and for around 10 hours, it runs 40k steps. So without cloud computing resources, you can still get started training and evaluating the SmolVLA on your robot for your tasks.
Ready to dive deeper into hands-on robotics? We curate a list of resources for you to learn more about the open-source robot ecosystem and the LeRobot project: awesome-lerobot. Please also subscribe to our newsletter to get the latest updates when new blog posts are published.